Sometime in the fall months of last year, I decided to give a friend (Francis) a music box for Christmas. Well it is a month+ past Christmas and yea I did not do that.
What happened was that I bought a 15 note music box kit online. The results from that little piano were pretty good so I decided to upgrade and buy a 30 note keyboard instead. I mailed the little 15 note guy and gave it away to another friend for him to fiddle around with while I waited for the 30 note big guy to arrive in the mail.
And well, I got it and it sucks. The lower and upper keys resonate so poorly- the pins on the cylinder drum don't do a good job plucking the keys. I am very dissatisfied with the product.
Unfortunately I couldn't return it. And I spent a lot of time punching holes into the music sheet ribbons thinking that it was a mistake on my side because the melodies played sounded so messy (and nope is not my fault I am very sure).I am very annoyed at it and I definitely do not want to keep it let alone look at it anymore.
Anyway, my dad suggested I make an electronic music box instead and I ended up following his advice (this is an ongoing project... and judging by how UGHH I am with this project, I probably won't finish for awhile).
I decided to send the music kit to Francis as a bad "bonus" gift because I didn't want to scrap the whole thing. This is what I did with it.... ugh lol.
Below are also two videos. The first video is part of the 2nd run of the laser engraving session. See the flashes of light? That is the laser doing its thing. The second video is of me playing the Pokémon X/Y bicycle theme.
What happened was that I bought a 15 note music box kit online. The results from that little piano were pretty good so I decided to upgrade and buy a 30 note keyboard instead. I mailed the little 15 note guy and gave it away to another friend for him to fiddle around with while I waited for the 30 note big guy to arrive in the mail.
And well, I got it and it sucks. The lower and upper keys resonate so poorly- the pins on the cylinder drum don't do a good job plucking the keys. I am very dissatisfied with the product.
Unfortunately I couldn't return it. And I spent a lot of time punching holes into the music sheet ribbons thinking that it was a mistake on my side because the melodies played sounded so messy (and nope is not my fault I am very sure).I am very annoyed at it and I definitely do not want to keep it let alone look at it anymore.
Anyway, my dad suggested I make an electronic music box instead and I ended up following his advice (this is an ongoing project... and judging by how UGHH I am with this project, I probably won't finish for awhile).
I decided to send the music kit to Francis as a bad "bonus" gift because I didn't want to scrap the whole thing. This is what I did with it.... ugh lol.
 |
| I sanded a block of wood for a very long time to mount the music kit onto. Look at how shiny it is. It'll be shinier after being buffed with wax too. |
 |
| Before laser engraving on the wood block that was laboriously sanded for forever, the image was first tested on a piece of cardboard. |
 |
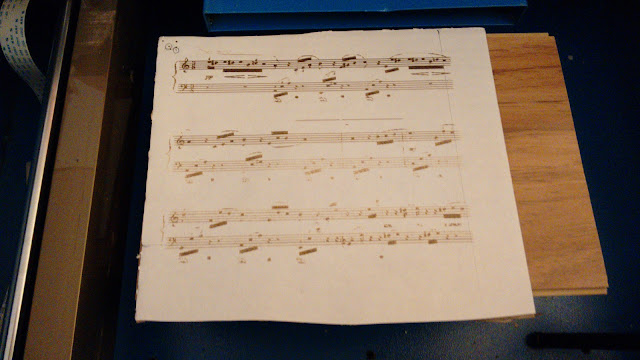
| We put a webcam in the laser engraver for viewing without looking directly at the laser. |
 |
| This is what the wood block looks like after the laser engraver hit it after 1.5 runs. The first run didn't engrave all the notes clearly. |
 |
| We did a few more runs of the laser for all the notes to show up okay. If you are very perceptive, there are a few holes because of music kit mounting purposes. |
 |
| Now the music kit is mounted and read to go!!! We didn't stain the wood this time around, but I did wax the surface. |
Below are also two videos. The first video is part of the 2nd run of the laser engraving session. See the flashes of light? That is the laser doing its thing. The second video is of me playing the Pokémon X/Y bicycle theme.


0 comments